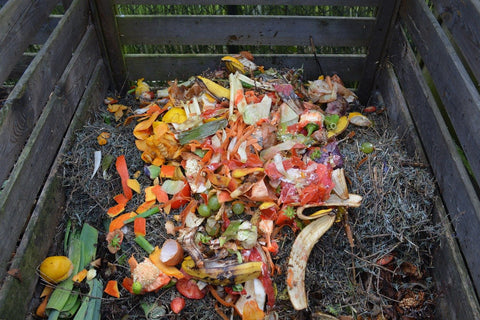
Unlike the hot composting method, the cold composting doesn't reach 60 degree Celsius. The bacteria involved work at a temperature between 21~32℃. The temperature of the pile is all-time low. It requires a big setup but needs little maintenance. It looks like a sandwich-like pile with alternating carbon and nitrogen layers. You only need to turn it once every six weeks. This is still a widely-used technique around the world and was first proposed by Sir Albert Howard in the 1900s, an English botanist.

Sandwiching the carbon-rich and nitrogen-rich ingredients
Pros :
When you have a lot of materials for composting, it has a fairly big capacity of 2m(W)*1.5m(L)*1.5m(H).
It requires low maintenance. Only two turns in 3 months.
It’s a fairly quick process. Three months to ripen.
Cons:
It needs a big outdoor space (2m*1.5m*1.5m).
Setting up the big sandwich-like pile is the most difficult part. It takes time and your hands will get dirty. But iComposter requires no efforts to compost. You have 100% chance to succeed.
The pile has to be this big to retain the heat. If you don’t have as much material, you need to gather, scavenge, or store the kitchen/yard waste, which is an unpleasant thing to do.
You can’t add your daily kitchen waste to the pile once it is set up. While iComposter takes your food scraps anytime, everyday.

Indore Method Pile
Steps:
-
First lay down a 2m * 1.5m wide, 15 cm thick layer of hard, woody, bushy materials like wood stakes and straw. This is the base of the pile.
-
Start laying down a 10 cm nitrogenous organic matter layer, which can be meat, bean protein, or manure, sprinkling some soil on it.
-
Lay down a 20cm thick carbonaceous organic matter layer, such as garden waste, leaves, green materials, and vegetables.
-
Keep alternating the nitrogenous and carbonaceous layers until the pile is 1.5m in height.
-
Spray the pile with a garden hose. To make sure you have the right moisture level, the materials should hold the water without dripping but when you squeeze the materials, you can see some water come out.
-
Leave the pile for six weeks without disturbing it.
-
Turn the pile on the sixth week for ventilation, letting more air in to boost the activities of aerobic bacteria.
-
Turn the pile again on the 12th week.
-
The compost should be ready to use in three months.
Notes:
-
If the pile attracts flies or smells bad, you turn it again. Or you can cover the pile with a 5cm thick compact soil layer for controlling the flies and odor.
-
The odor means it lacks oxygen so anaerobic bacteria are working instead of the aerobic ones. You need to turn the pile to add some oxygen.
-
Modification:
Use a black plastic bag for the base instead of woody materials, then you can trap the liquid draining from the pile. The liquid should be returned to the pile.


0 Comments